First, let's prepare the canvas.
Open a new image, raster background, 400px width/600px height.
Fill the background with a light gray color #c0c0c0 (your eyes will thank you!).
Set foreground color to your choosing - a light color works best. Background to null.
Go to View>Change Grid, Guide, and Snap properties. Under current image settings, set the horizontal and vertical to 20 pixels. Set the snap influence to 10.
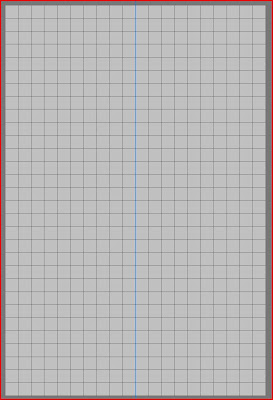
Go to View>View Grid. Then View>Snap to Grid. And finally, go to View>View Guides. Place a guide line vertically at 200px. Your canvas should look like this
Activate the pen tool, choose these settings. Set the line width to 5px. Line style solid. Anti-alias checked.

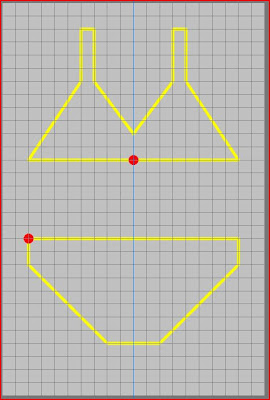
I swear, there really is a tutorial here! So, let's get busy on that swimsuit. Think of your drawing as a connect the dots. I've found it easier to start with the swimsuit bottom to get a better idea of the placement. Working in a clockwise direction, roughly "sketch" the shape of the swimsuit by clicking along the grid lines to place anchor points. Try to use as few anchors as possible. It makes for a smoother shape. I marked my start and end points in red. When you finish drawing your shape out, right click on the starting anchor, choose Edit>Close.
So, now it's time to start shaping the swimsuit. We're going to do this using the Curve Before and Curve After node types.
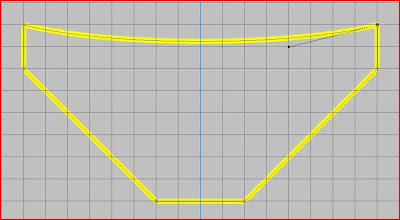
Switch the Pen mode to Edit. Beginning with the starting node on the bikini bottom, right click and choose Node type> Curve after. This is the point when the zoom comes in really handy. Although you might not be able to see it all that clearly, there's a handle coming off of the anchor. You want to find the end of that handle. When you place the cursor over the end of the handle, it will change to a plus sign with rotating arrows. Click and drag the arrow straight down until it "snaps" against the grid line below. Still working in a clockwise direction, move to the second anchor and right click, choose Node type. This time select Curve before. Again, drag the end of the handle straight down until it snaps. (The reason I do the clockwise thing is that it makes it easier to remember whether you need the before or after curve. Sometimes you will need both.) This is what you should have now
To shape the legs of the suit, click on one of the bottom two anchors. Right click, Node type> is it curve before or after? I'll let you try it and see. You want to pull the handle straight up until you are happy with the curve, like this
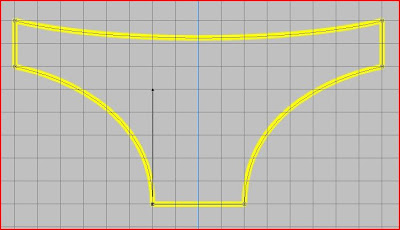
And you have your bikini bottom. Now you can tweak the shape if you want. Spend a little time moving the nodes around a bit to see how it looks. When you are happy with it, move on to the top. This is a little trickier, but still very easy to do.
Just as with the bottoms, click on the nodes, choose the curve direction, and pull the handles out to shape the curves. You can go simple or complex.
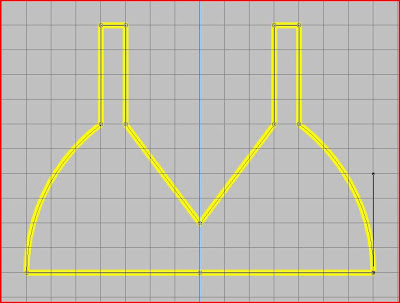
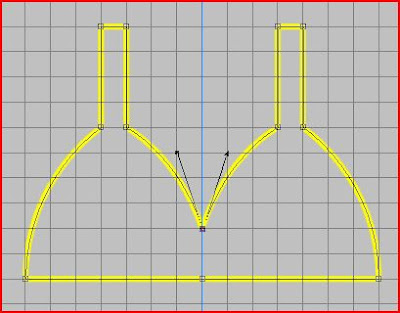

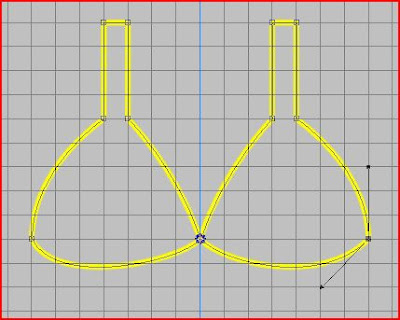
To shape the straps, move the nodes at the top of the cup one grid square toward the outside.
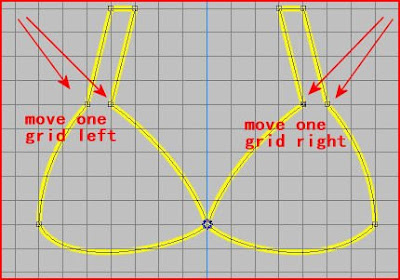
Still working with this group of nodes, select the leftmost node, right click and change the node type to Symmetric. The curve is perfect, so no need to do anything with the handles. Repeat on the node farthest to the right. Select the inner left node, change the node type to Symmetric. Uh oh, it's all squished now. To fix that, grab one of the handles and drag it back to the same vertical line that the node is on. Repeat on the inner right node.
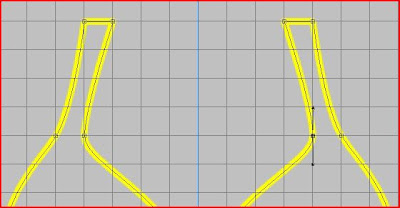
Hang in there, almost finished!
When you are happy with the shape of your suit, you can turn off the grid view. In your color palette, switch the foreground and background. Your suit is now filled with the color you drew the lines with. To save as a template, change the fill color to grey or black by clicking on the plus sign beside the Vector layer and then double clicking on the path. This brings up the Vector property box. Make sure stroke is unchecked. Click on the fill color and make it what you want. Delete the background raster layer. Now you can save as a fully scalable template (.PSPImage) or export as a preset shape.
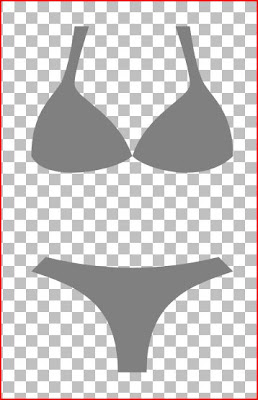
I would love feedback on this tutorial. I tried to write it from the perspective of someone who is familiar with PSP, but not the pen tool. I hope I haven't bored or confused!
Mel
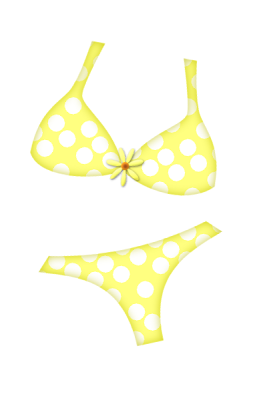


This looks like fun, I think I'll give it a try in while. Looks great sweety..
ReplyDeletethanks
Linda
I loved your tutorial. Super easy! Great job! I'd love to see more tuts.
ReplyDeleteSmiles,